For developersElastiCache to Azure Managed Redis (AMR)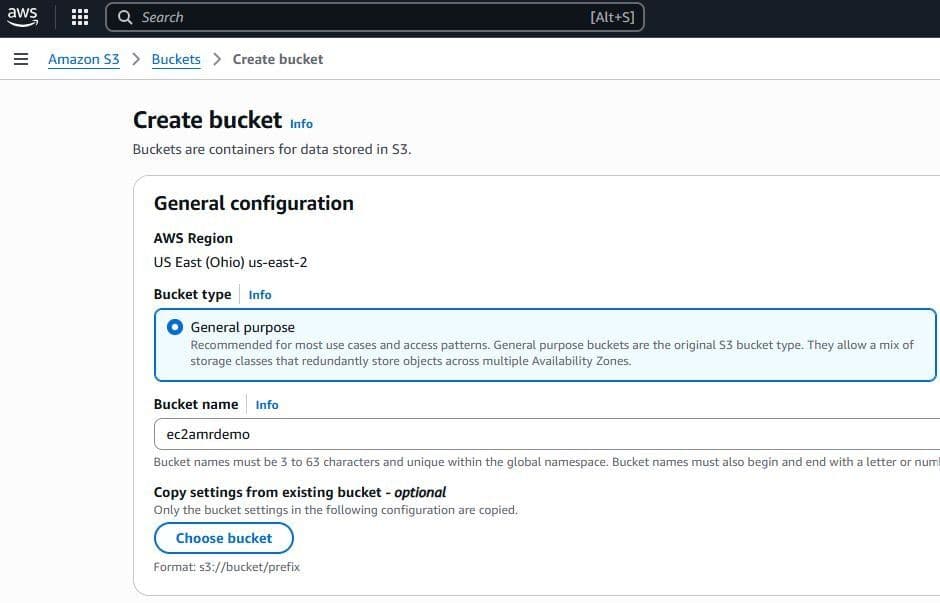


Before migrating to Azure Managed Redis, you should evaluate the migration and consider the best option. Read this guide to determine which migration strategy is right for you. Note: Reach out to our team for support on live migrations.
#Offline data migration
#Create an S3 bucket with proper permissions
Open Amazon S3 and create a new bucket. The ElastiCache backup and the Amazon S3 bucket that you create must be in the same AWS Region.
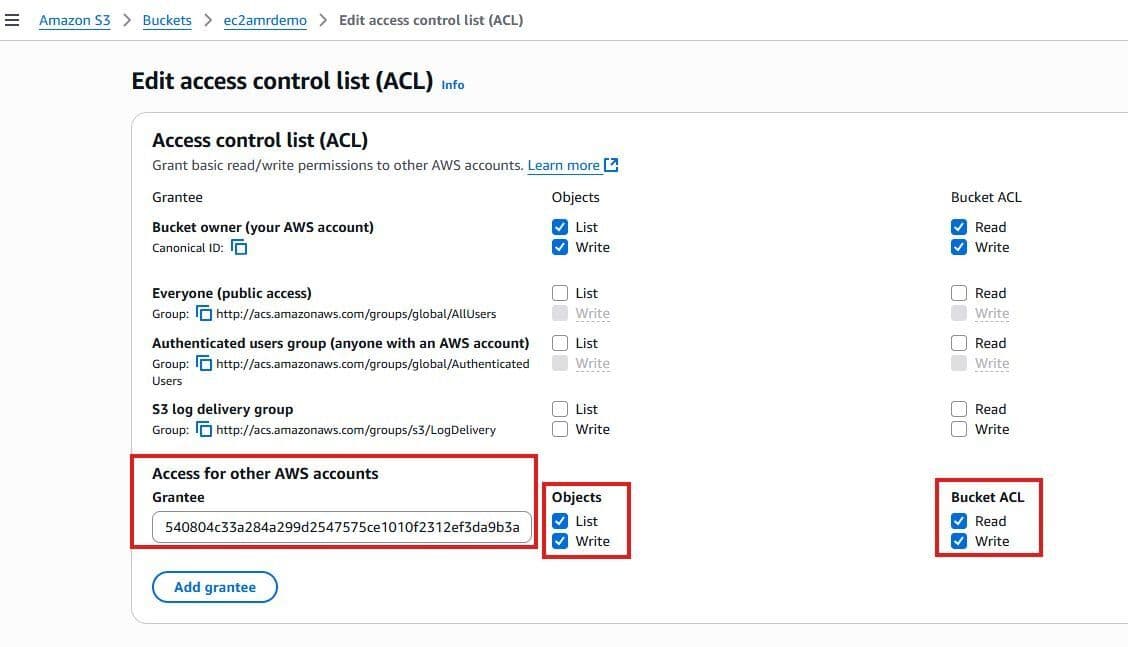
Navigate to your new S3 bucket and go to the Permissions tab
- Under Access Control List (ACL), choose Edit. Select Add grantee,
- Elasticache canonical ID (paste this in under Grantee): 540804c33a284a299d2547575ce1010f2312ef3da9b3a053c8bc45bf233e4353
- Select Objects > List & Write
- Select Bucket ACL > Read & Write
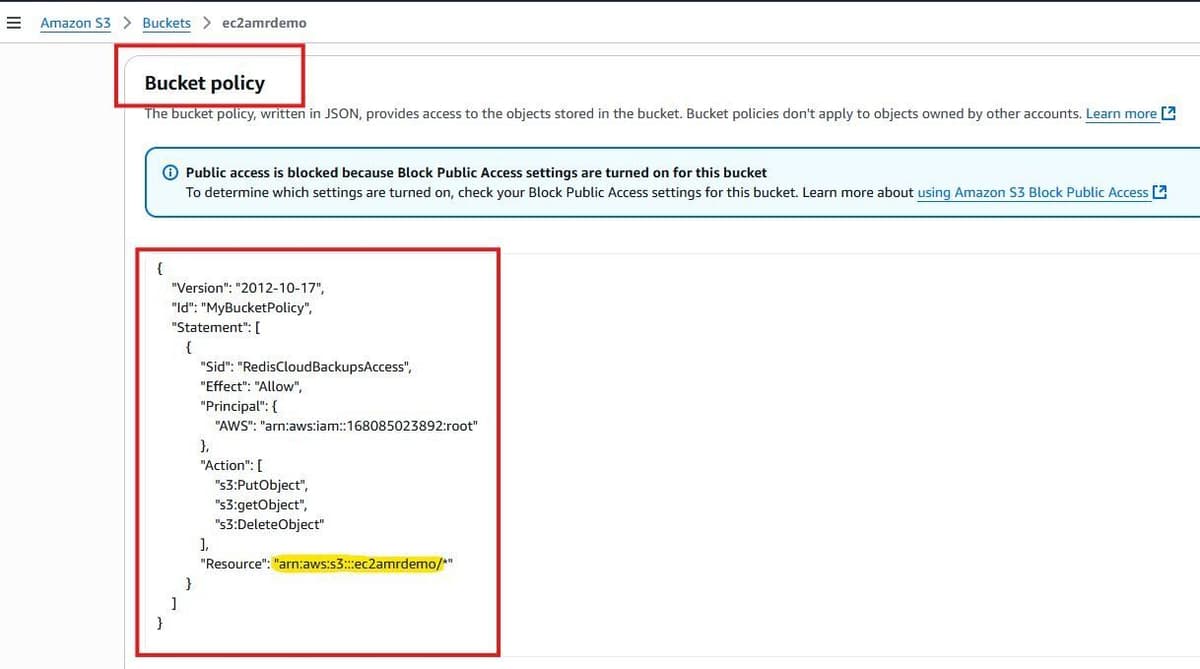
Under the Permissions tab still, add the following JSON to the Bucket Policy section. Replace UNIQUE-BUCKET-NAME with the name of your S3 bucket:
#Create a Backup from ElastiCache
- Navigate back to your ElastiCache instance
- Select the Actions button, and create a Backup
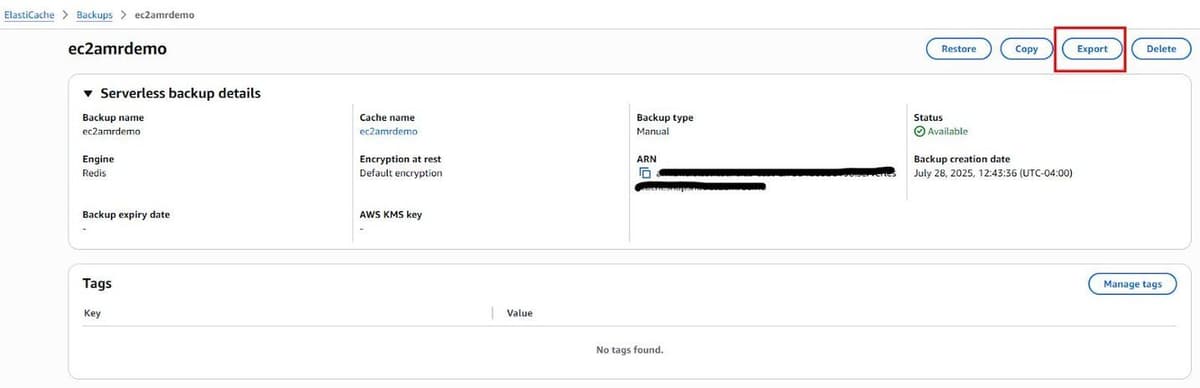
#Export from ElastiCache Backups to S3 Bucket
- Navigate to the Backup page within ElastiCache and select the Backup you created.
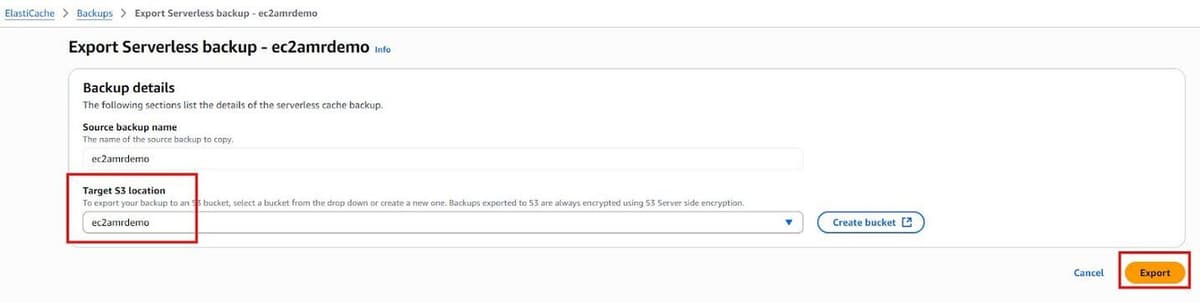
- Within the Backup, select Export
Select the Target S3 location as the S3 bucket we created in step 1.
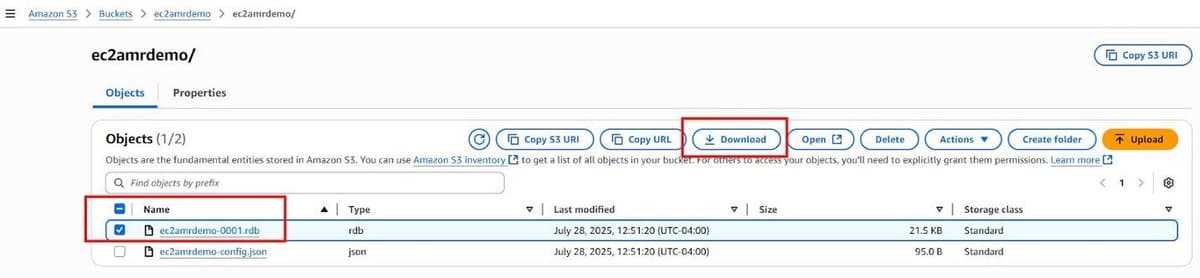
Return to the S3 bucket, and download the .rdb file that was created.
#Import RDB file to Azure Blob
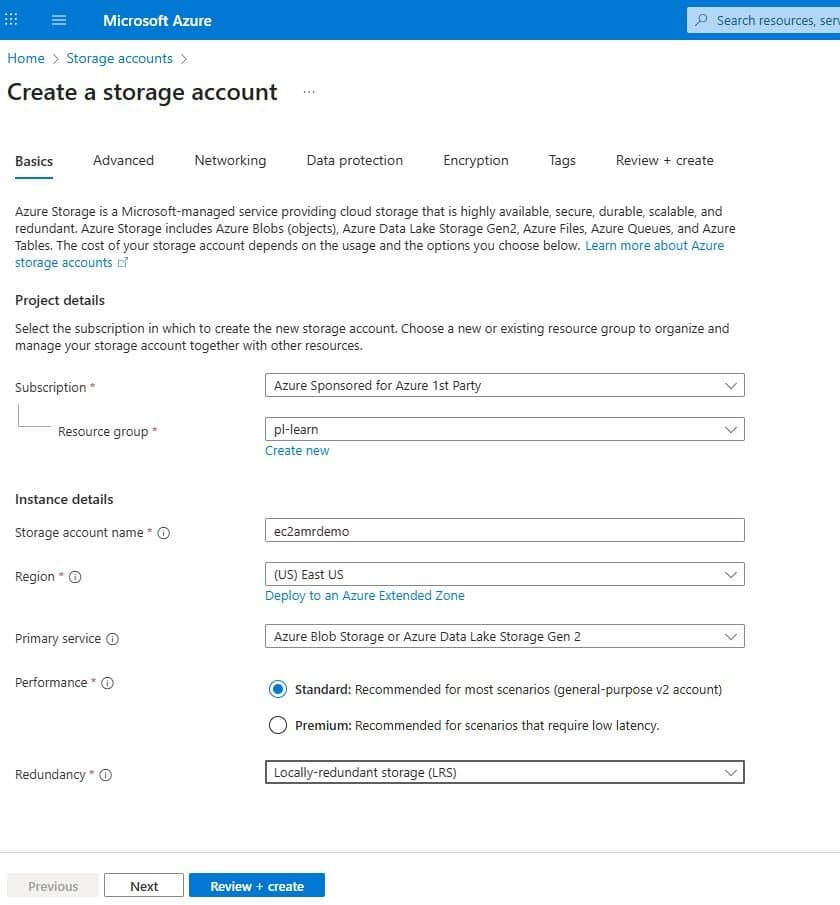
- In the Microsoft Azure console, navigate to Storage Accounts
- Create an Azure Blob instance
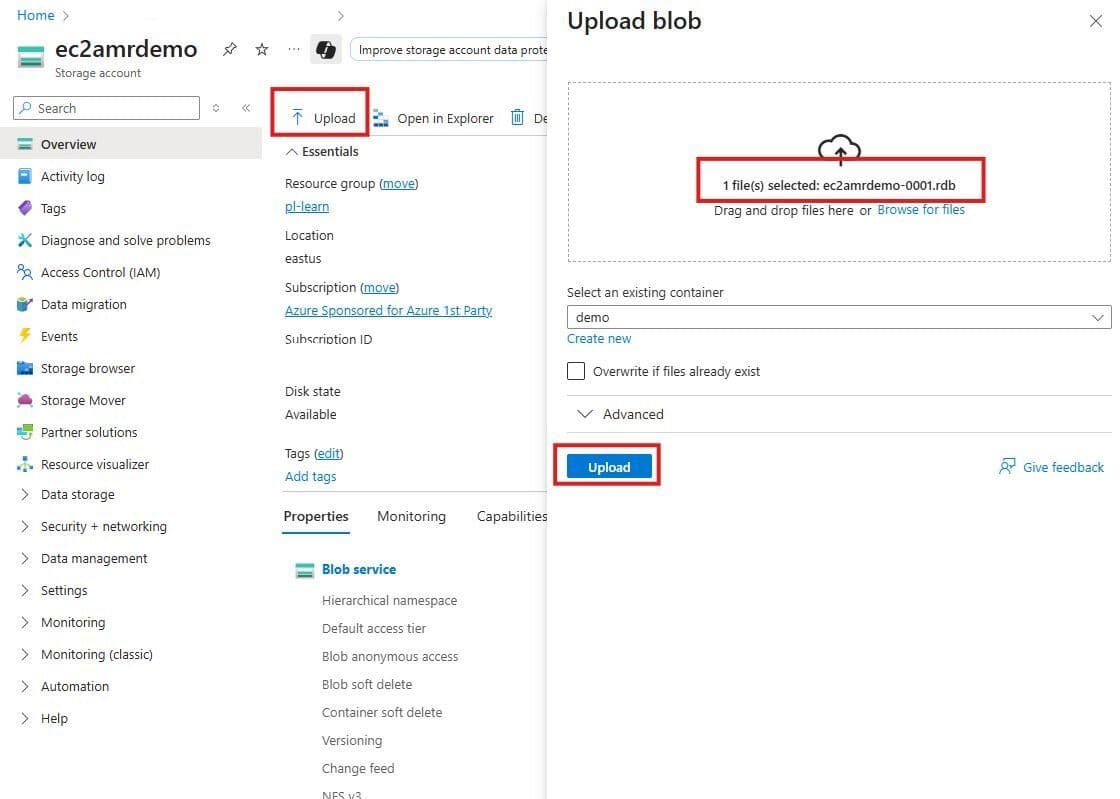
Upload your .rdb file into the Blob container
#Create your Azure Managed Redis instance
- Navigate to Azure Managed Redis
- Select a size that fits your data set size captured in the initial steps on Memorystore. The rough estimate for sizing is your [current data set size * 1.2] = AMR data size (round up to the nearest size)
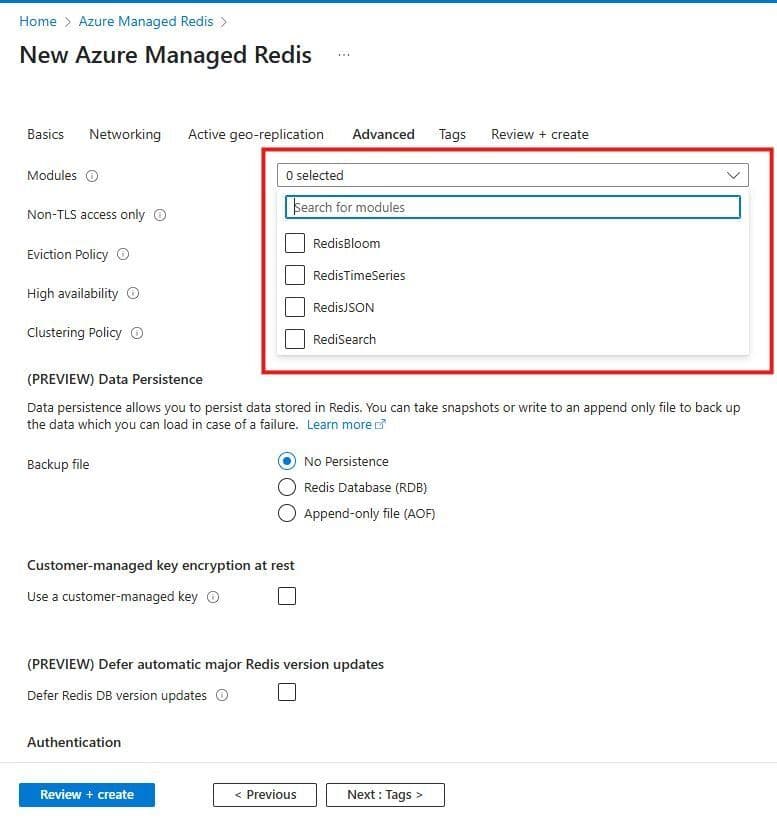
Select the data modules that you used within your Memorystore instance (RediSearch, RedisJSON, RedisTimeSeries, RedisBloom)
Create your instance
#Import RDB file into Azure Managed Redis instance#
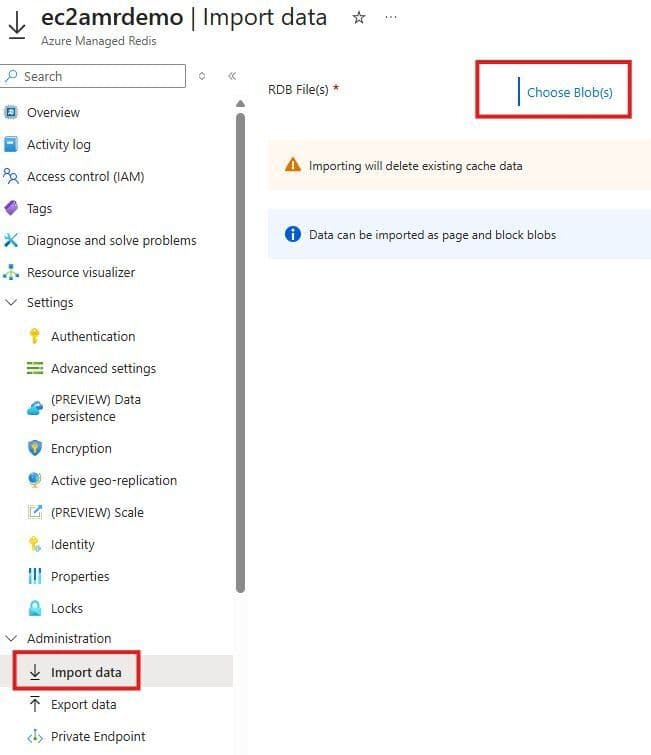
- Navigate to your instance once it’s been created
- Go to Administration > Import Data
NOTE: Importing will delete existing cache data
- Choose your storage account which has the .rdb blob
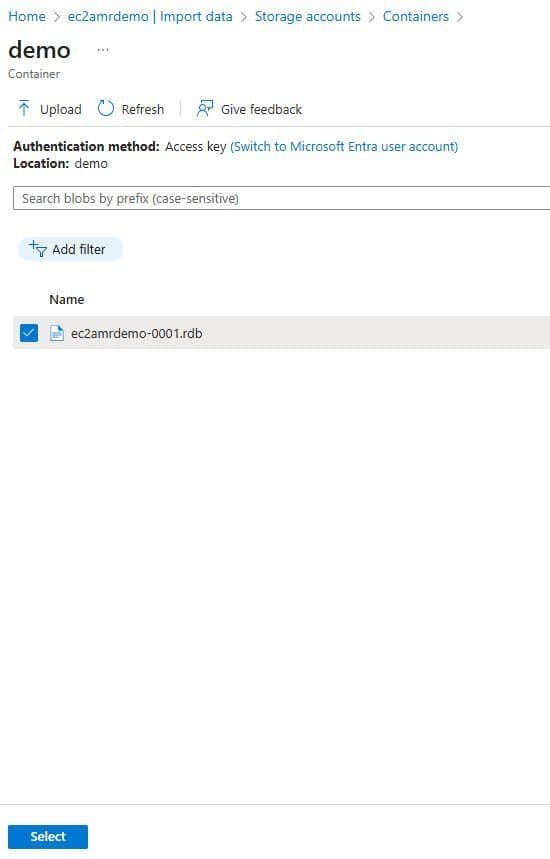
- Select the .rdb file you wish to import
Import your data.